

|
First of all we need a gp4 car that we can get out gp4 (read my
Vicente Martí Making a gp4 car tutorial
) and visit some of the links at the end of the page. And finally we have to get a free copy of Blender from thier home page: www.blender3d.org |
|
The next step is export our car car in 3ds format wiht ZModeler1.07b (read how to export
the car in my
Vicente Martí Making a gp4 car tutorial
, you can find and explanation about how to export the car in gp4 format but now we want
to select the 3ds fomat, remember to load the textures before exporting). Now we have our car in 3ds format and the textures. |
|
The next step is import the 3ds file into blender.
To do this we will use a 2ds improter for blender that imports the mesh, UVmapping, materials and textures.
The Phyton script that you have to download is:
import_3ds_blender_textures.zip
To install the script: **************************************************** * * * Install import-3ds-0.7-textures.py Instructuions * * * **************************************************** Feautres: ---------- This scrpit imports the mesh, the textures and the UV mapping from a .3ds file. So you can export your model in this format from ZModeler and then import it into Blender. How to install: --------------- Place the import-3ds-0.7-textures.py file in "Blender Foundation\Blender\.blender\scripts". The new importer will be available under the import menu item. This script works to me on blender2.37. ***************************************************** |
Now start blender and you will se the next picture: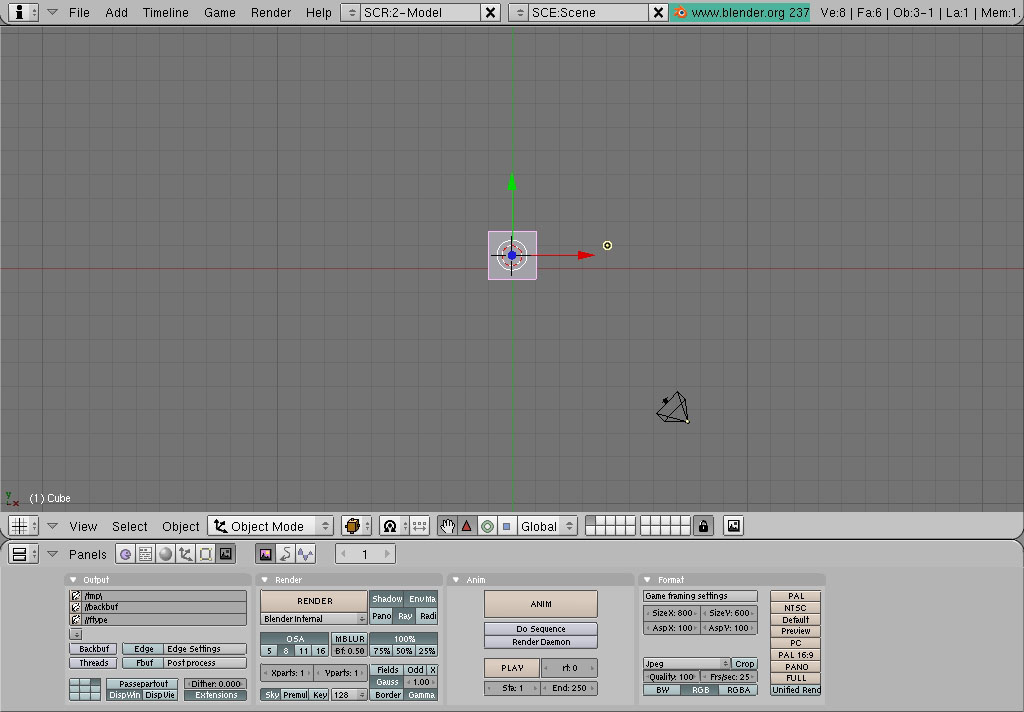
Delete the cube by selecting it (right mouse click and the objet will have a pink border) and presing Supr key or XKEY. Now go to File > Import < 3DS 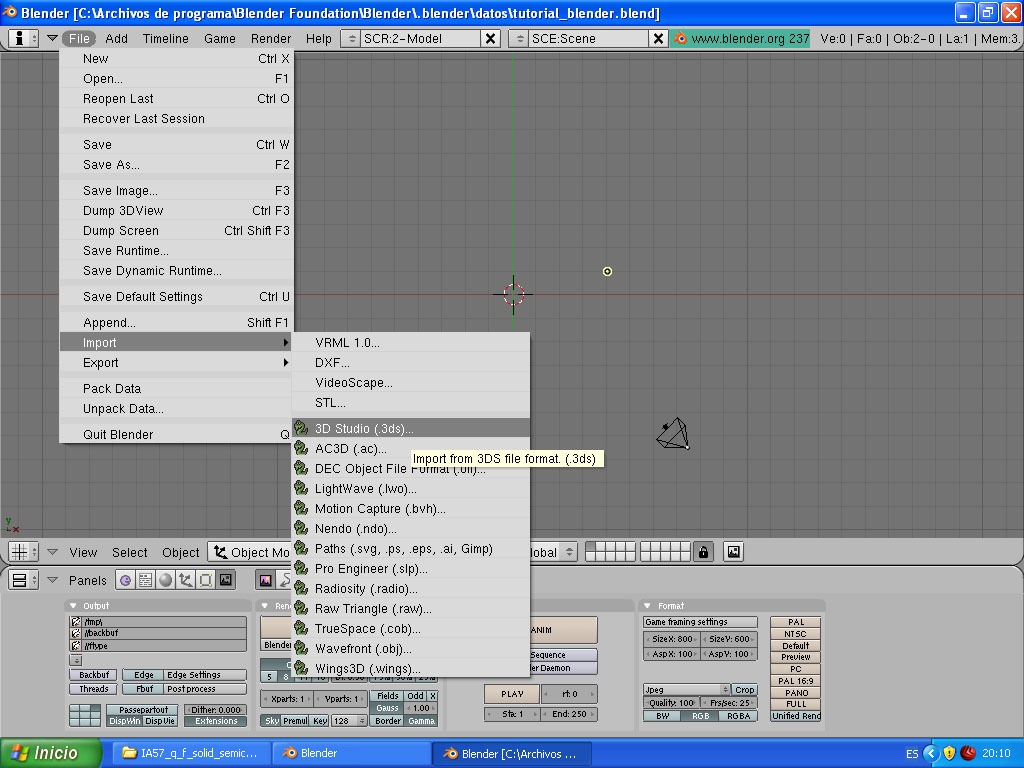
and select your 3ds file. 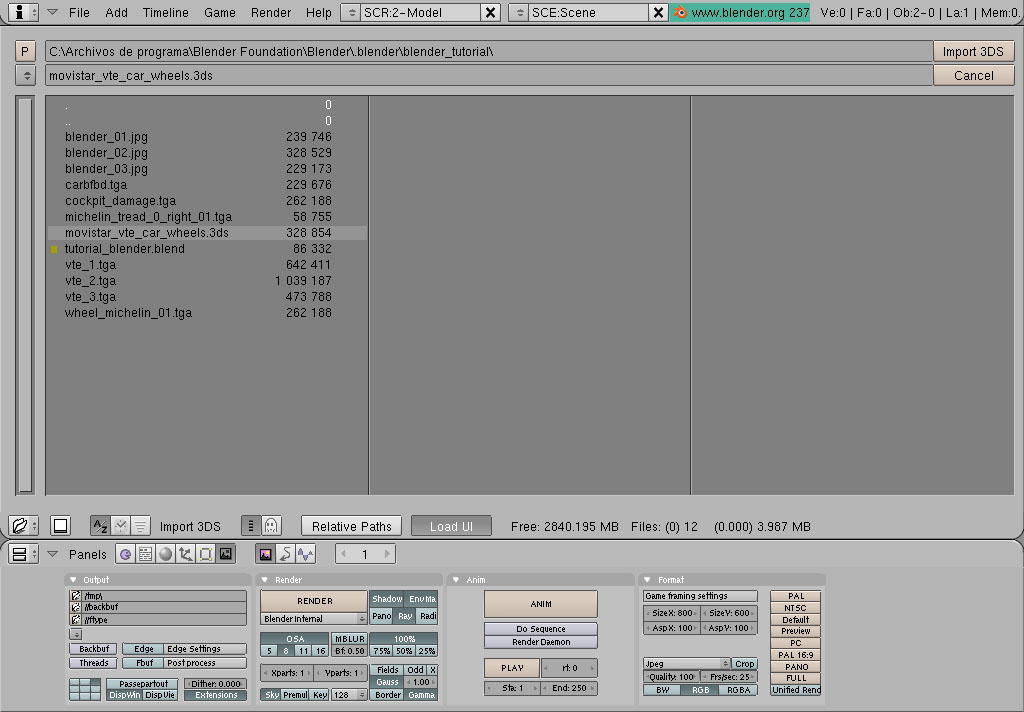
The result is your gp4 car into blender with the uvmapping and the texures imported: 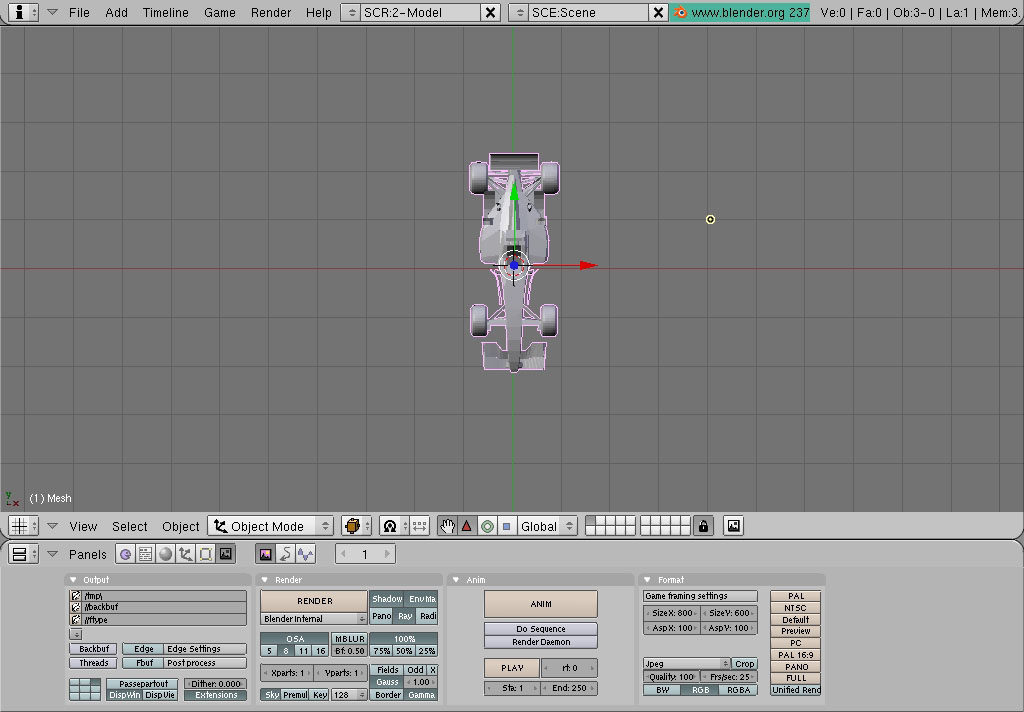
Save this file in order to work with it later. |
The next step is to set the surface of the car smoth, to do it press F9 on your keyboard
and then select SetSmoth.
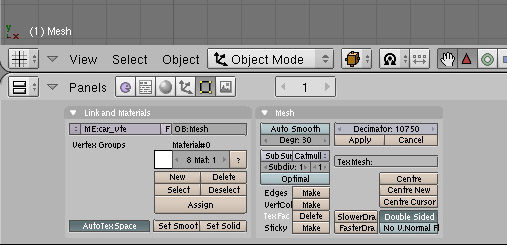
Now go the the the Texture butons by presing F on you key board and add a new teture, on the list select image and then click on the load image buton and select your image on the file window that will appear (you can use jpg format, tga format... I'm using the tga format.) 
Finally add a name for you texture (click over the Default name (Tex) and write your name). 
Do the same for all textures. To add a nex texture click over a empty slot and clic over Add New. 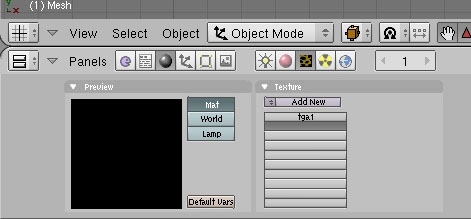
|
|
Now we have to assing the correct texture for each material (each material contains
the UVMapping). To do this go to the material butons (Red Sphere button) and select the desired material from the list (the order is the same that on ZModeler, for example in my case the materials on ZModeler are: COCKPIT_DAMAGE.TGA CARLIGHTMAPCH2.TGA CARLIGHTMAPCH3.TGA VTE_1.TGA VTE_2.TGA VTE_3.TGA CARBFBD,TGA WHEEL_1.TGA WHEEL_2.TGA ) In my case the material number 4 in the list is the VTE_1.TGA material, so you have to search the corret material. It takes few time. 
Now select the correct texture from the list of thextures. 
And finally we have to set the map input to UV. 
Finally pres F12 to make a render from the active camera. To save the render in jpg format press F3. 
|
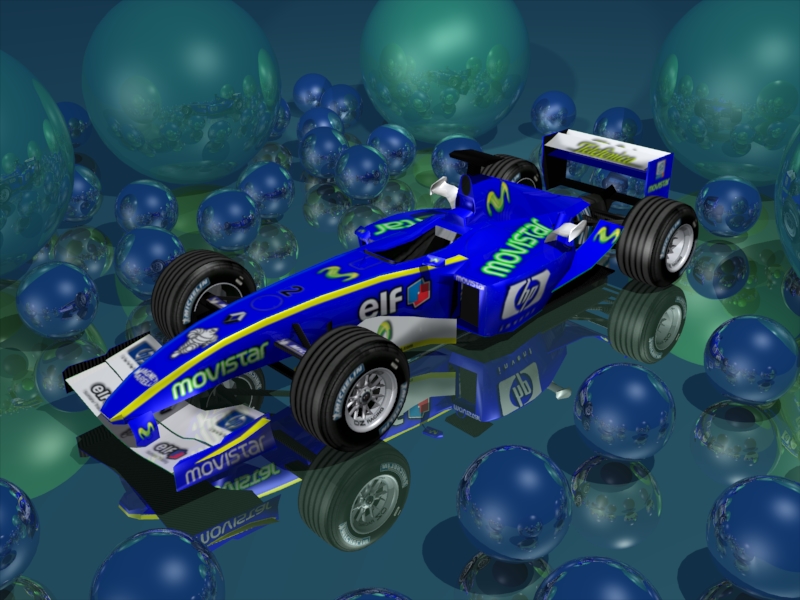
Adding all the materials and making a simple scene we can get a good render like this:
|
|
Finally, my intention is to make a guide that explain the proces of making
a simple render with blender (a GNU free 3d rendering program). Note that I will update this page in a near future. You can also visit my Vicente Martí Making a gp4 car tutorial if you want to make your own gp4 car. ----------------------------------------------------------- Vicente Martí Vicente Martí home page Vicente Martí Making a gp4 car tutorial 
|
| Useful links |